Apple has changed the world of technologies, and the macOS comes with many in-built features. One of the most impressive features is the capability to record the screen content using the native Quick Time Player tool.
However, Quick Time Player doesn’t record internal audio when screen recording takes place. That is because the tools only allow audio recording from the microphone.
But the internal audio doesn’t get recorded. In that case, you need to look out for other alternatives. For instance, you can install third-party apps or Chrome Extensions.
In this article, we will talk about the different ways you can record a screen on Mac with internal audio.
You can set up a virtual sound card to record the screen on Mac with internal audio. However, there is a significant problem prevalent.
If you are not experienced in setting it up, it will have a negative impact on the audio settings.
That means you can encounter issues with the media keys.
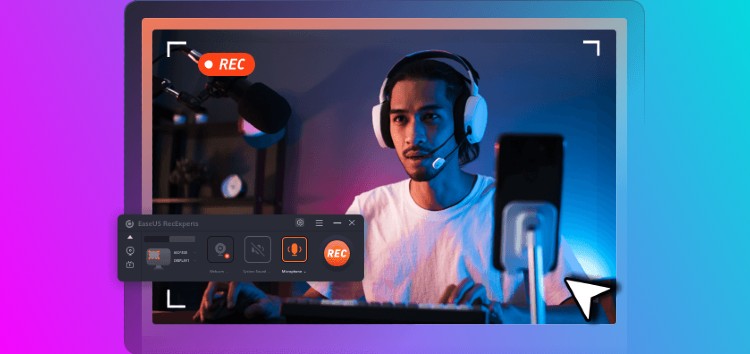
Here, the solution is to opt for an excellent third-party app. One such reliable and an efficient screen recorder for Mac is EaseUS RecExperts. It is one of the best multipurpose screen recording software tools with many features.
It can develop recording tasks, annotate recordings, upload recorded videos, and much more. You can even take screenshots. The software is easy to use and has a simple interface. Go for the free trial and see if it meets your requirements!
This software can record webcams, audio, video, and even images. You can also record YouTube videos, games, Zoom meetings, etc. The software makes it possible to conduct full-screen or part-screen recordings.
Apart from that, you can also record more than one screen simultaneously. EaseUS RecExperts records different types of audio. For instance, you can capture sound from the microphone or the Mac.
Besides, you can set a time to stop or start a recording. Here, the tool comes with the ability to offer schedule recording.
Other excellent features include auto-stop recording. You can set it up, so the tool stops recording when it reaches a particular file size or duration.
Moreover, you can also edit recordings. After the audio and video are recorded, you can save them in more than ten formats. These include MP4. MP3, AVI, PNG, etc.
Record with RecExperts on your Mac
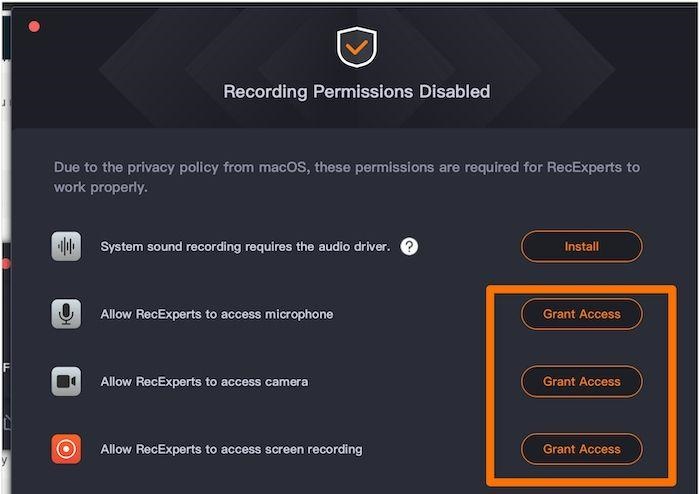
Step 1: Assuming that you have downloaded and installed RecExperts on Mac, the app will ask for certain permissions for the proper working. Click on Grant Access in front of each permission.
Step 2: You will see the bar in the middle of the screen. Click on the big orange round button that says Rec to record the screen.
Step 3: Click the Stop button from the Menu bar to stop recording.
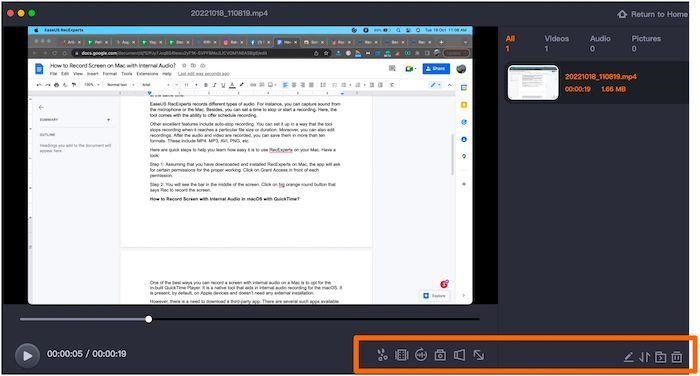
The app will show you the current recording. You have the option to trim, extract audio, add opening/closing titles, screenshots, etc., right there. That’s a neat option, right?
You can also click on Settings to change the default settings, including the path where you want to save the recordings.
How to record screen with internal audio in macOS with QuickTime?
One of the best ways you can record a screen with internal audio on a Mac is to opt for the in-built QuickTime Player. It is a native tool that aids in internal audio recording for the macOS.
It is present, by default, on Apple devices and doesn’t need any external installation.
However, there is a need to download a third-party app. There are several such apps available in the market. You need to choose the one that suits your needs the best. That is the only way you can use QuickTime Player.
Besides, it would help if you remembered that the app has several limitations. For instance, you can’t edit anything, or you can’t opt for the recording of video and audio simultaneously.
Mac users opt for QuickTime Player as it is easy to use. No effort must be made to search the app and download it as it is already present.
Take a look at these steps:
Step 1: Go to QuickTime Player on the Mac. For this, you can opt for either of the two ways:
- Go to the search bar and type QuickTime Player to open it.
- Visit the Application folder and search for QuickTime Player. After that, double-click on it, and it will open.
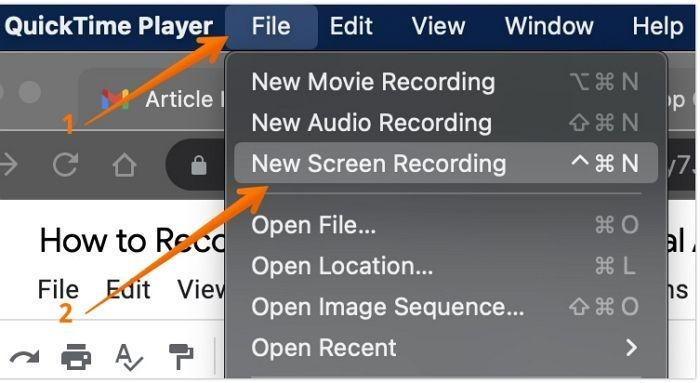
Step 2: Now, click on File present in the upper-left part of the menu bar.
Step 3: Press New Screen Recording. A screen recording window will pop up.
Step 4: Select the red button present on the window. It will start the recording. Here, you have the option to record a part or the whole screen.
Step 5: If you want to record the entire screen, you can click anywhere you want to start the recording.
Step 6: If you only want to record part of the screen, you must drag the area to adjust the size. After that, click within that particular area to start the recording.
Step 7: When you want to stop the recording, click the stop button. It is present in the upper-right part of the menu bar.
How to record screen and sound on Mac using Chrome extension?
The third way to record audio and video on Mac is to use the Chrome Extension. It is an excellent choice if your recordings are particularly associated with a web browser like Chrome.
Here, you don’t need to download and install a third-party app. Instead, opt for a reliable and efficient Chrome extension.
The Chrome Extension works flawlessly to record the internal audio and screen on the Mac. You do not have to invest too much effort or time in this. Also, there is no need to worry about the watermark while recording.
Various Chrome extensions are available in the market, such as Screen & Webcam Recorder. Choose the one you want by taking a look at the features. These are the general steps you need to follow:
Step 1: Firstly, visit the Chrome store of the Extension you want. Search for the extension you want to add. In our case, we will search for Screen & Webcam Recorder.
Step 2: Once you find the extension, click Add to Chrome.
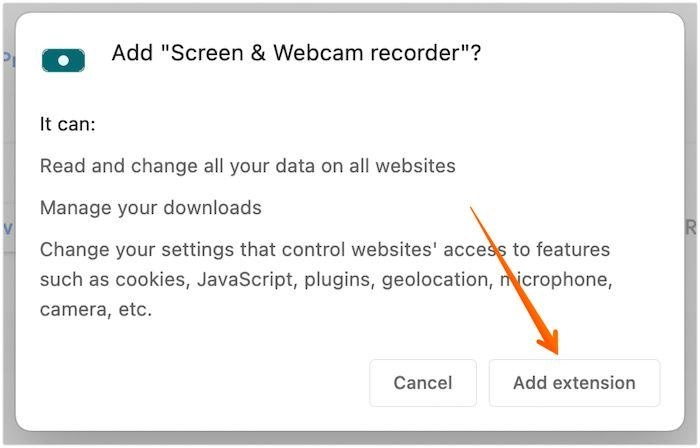
Step 3: A confirmation pop-up will appear mentioning what permissions extension needs. If you are Okay with that, click on Add Extension. It will add the extension to your browser.
Step 4: You can start using the extension by following the instructions. You need to click on the extension icon.
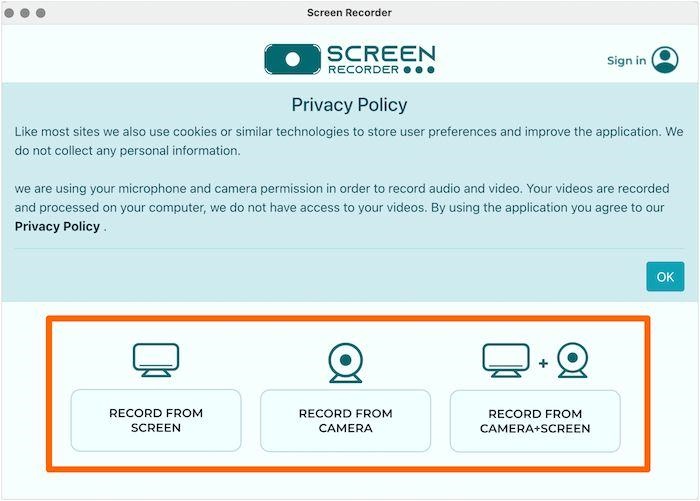
Step 5: Once the program is launched, it will give you three options: Record from Screen, Record from Camera, and Record from Camera + Screen. Choose the one appropriate for your task.
Final Words
Even though Apple strives to offer the best user experience, there are some limitations. It is incredibly upsetting that setting up the recording of the screen with internal audio on a Mac is so challenging.
That is why we have elaborated on how you can proceed with recording the internal audio. One of the best ways to proceed is to use the EaseUS RecExperts.
It is a multipurpose yet reliable screen recording software to record audio, video, image, webcam, etc. The wide range of features makes the app even more appealing.
Disclaimer: This is a sponsored post, made possible in association with EaseUS. PiunikaWeb doesn’t take any responsibility of the product being advertised here.
About EaseUS: The company was founded in 2004 and offers software solutions to solve data loss, downtime and transfer with simplicity. EaseUS claims to have served over 5 million happy customers.
PiunikaWeb started as purely an investigative tech journalism website with a main focus on ‘breaking’ or ‘exclusive’ news. In no time, our stories got picked up by the likes of Forbes, Foxnews, Gizmodo, TechCrunch, Engadget, The Verge, Macrumors, and many others. Want to know more about us? Head here.

